 Ever wonder what else you can do to help your plants thrive? Try testing the pH of your soil! Robust plants start from the ground up, and maintaining healthy soil is the first step towards a successful crop.
This all-encompassing guide will help anyone who is just starting out with soil pH testing. (And experienced growers will be able to learn something, too!)
- What is Soil?
- What is pH?
- Why Test Soil pH?
- Things That Affect Soil pH
- Optimal Soil pH Ranges
- How to Test Soil pH
- Soil pH Testing Options
- Care & Maintenance of Your Soil pH Electrode
What is Soil?
Water, air, and soil are the largest groups of natural resources that humans use. Soil is the loose material on the surface of the Earth that allows plants to grow. Think of the Earth as an onion with layers. Soil is only the very thin (about 200cm) top layer of the onion. All plants are grown in that thin layer.
No matter where you are on earth, soil has three main components: inorganic, organic, and microorganisms.
- The inorganic part of soil has minerals from rocks that have broken down over time. Plants use these minerals to help them grow. When thinking about soil, we tend to think of only these mineral components. Yet, the inorganic part of soil also contains liquids (water) and gases (air).
- The organic section of soil is the broken down remains of plants, animals, and other living things.
- Microorganisms live in the soil and are usually too small to see with the naked human eye. They help to break down dead material into soil.
 There are five main factors which affect how soil is formed: climate, organisms, an area’s geology, topography, and time. With all these variables, it’s no surprise that soil varies greatly from location to location, even within relatively small areas.
What is pH?
pH is a measurement of how acidic or how basic (alkaline) a substance is. When you test pH, you’re measuring the amount of hydrogen atoms that carry a positive charge.
The higher the concentration of hydrogen ions, the more acidic the sample is. The lower the concentration of hydrogen ions, the more basic a sample is. Acidic substances fall between pH 0 and pH 7 on the pH scale. Basic substances fall between pH 7 and pH 14 on the pH scale. pH 7 is completely neutral; it is neither acidic nor basic.
Common acidic substances include orange juice, soda pop, and black coffee. Common basic items include gin, baking soda, and household cleaners. Pure water is completely neutral at pH 7.

Why Test Soil pH?
Correct soil pH is essential to ensure optimal plant growth and crop yield, because it allows nutrients to be freely available for plants to take in. Testing the pH of your soil helps to determine what plants are best suited for that area.
Sometimes soil needs supplements, like fertilizers and soil pH adjusters, for plants to be able to thrive. Measuring the pH can help you figure out what and how much you need.
Things That Affect Soil pH
Many things can affect the pH of your soil. The most common factors are climate and weather, other plants in the area, the pH of your irrigation water, soil type, the kind of fertilizer you use, and nutrient availability.
Climate and Weather
Temperature, precipitation, sunlight, and seasonal weather changes all influence the soil pH. High precipitation, for example, will wash essential nutrients out of the soil. Many nutrients, such as calcium carbonates, are basic so as these nutrients leave the soil, it becomes more acidic.
Water coming into contact with decaying material in the soil (like leaves, for example) can also cause the pH to drop, because decaying matter releases carbon dioxide. When carbon dioxide mixes with water, acids can form.
Drier climates or regions going through a drought will have a more alkaline soil pH. Because there isn't as much water moving through the soil, minerals and salts become concentrated, increasing the pH.
Plants
Native plants and local ecology can determine the starting pH of your soil. Soil underneath grasses is usually less acidic, while soils formed under trees tend to be more acidic. This is due to there being more decaying matter (leaves) near trees. The very crop you are growing can even alter your soil’s pH.
Irrigation Water
The water that you use to irrigate your crops will also influence the pH of your soil. If the water used is more acidic or more basic than the soil it is irrigating, the pH of the soil will shift.
Soil Type
Did the soil in your region form from granite, limestone, or shale? These parent materials will determine if your soil is more acidic or more basic. Areas with a lot of shale tend to be more acidic, while areas rich in limestone are more basic.
The texture of your soil will also determine how easy or how difficult it is to adjust the pH; this is known as the soil’s buffering capacity. Sandy soils have a lower buffering capacity while soils with more clay will have a higher buffering capacity. It's harder to change the pH of soils with higher buffering capacities.
Fertilizer
Fertilizing soil is very important to get the best crop yields. Because pH will affect how easily available nutrients are to plants, it's important to check soil pH before and after adding any type of fertilizer. By knowing your pH you can decide how much and what type of fertilizer you need.
Artificial nitrogen fertilizers tend to lower pH the most in soils. Organic fertilizer will acidify the soil once they come in contact with water, because of the soluble organic acids they contain.
Nutrient Availability
Plants cannot absorb nutrients if the soil pH is too low or too high. When soil pH is off, nutrients such as calcium and phosphorus will bind up with other things in the soil. When the nutrients become bound up, plants will not be able to take in what they need to grow.
Most nutrients are available when the soil is slightly acidic, but different plants thrive in different pH ranges depending on their specific nutrient requirements. If the pH is too low, aluminum toxicity can occur. When this happens, aluminum becomes unbound and the plants take it in at toxic levels.
If the pH is too high, nutrients like iron become bound. Without adequate iron uptake, plants will lose their chlorophyll and start to turn yellow, indicating the plants can no longer make food for itself. Molybdenum poisoning can also occur in soils with alkaline pH, resulting in stunted crops.
Optimal Soil pH Ranges
Plants that thrive in more acidic soil include apple trees (pH 5 – pH 6.5), potatoes (pH 4.5 – pH 6), and orchids (pH 4.5 – pH 5.5). Alkaline loving plants include acacia and walnut trees (they both like soil between pH 6 – pH 8).
To figure out the best pH for your needs, do a little bit of research on the type of plants that you want to grow. Natural soil is typically between pH 4 and pH 8. If your soil's pH doesn't match the plants optimal range, you'll need to treat your soil.
Soil too acidic? Popular options for treatment are lime, calcium carbonate, and ground up eggshells. If the soil is too basic then gypsum, iron sulfate, sulfuric acid, or calcium chloride can be added.
 Irrigating the soil frequently can help lower the pH if it is too high as well. However, be careful not to over-water the plants if the treatment of the soil is in a planted area. This can cause diseases to set in, and nutrients can get diluted or washed away.
Hanna Tip: The cost of the materials and the size of the planting space will also be a factor in how you treat your soil. For example, it's much more workable and affordable to treat a small home garden with ground eggshells than to do so in several acres of field.
How to Test Soil pH
The two primary ways to test soil pH from field samples are slurry testing and direct soil testing. It is important that the soil samples and tests take place in the same spots and the same way every time.
Slurry pH Testing
The slurry method allows you to get a representative sample and measurement of an entire area with just one test. Because soil pH can vary within a small area, be sure to take a representative sample. The soil should be taken from the same depth below the surface each time you test.
When using the slurry method, take soil from next to the plants, as well as some from further away. (Keep these two samples separate.) While this means a little extra work, you will get measurements that are more accurate since the amount of nutrients, types of soil, and moisture content can vary across a planted area.
All these things affect the pH of soil, so it's important to track your pH at many points.
How to Test Soil Using the Slurry Method
- Gather some soil from the test area.
- Take the homogeneous sample and add equal parts of soil and distilled or deionized (DI) water in a 1:1 ratio. So, for 25 grams of soil you would add 25 mL of water.
- Stir the sample for 5 seconds.
- Let it sit for 15 minutes.
- Start stirring the sample again after 15 minutes, and take your measurement.
Video: How to Prepare a Soil Slurry
Direct Soil pH Testing
Direct soil pH testing gives you the benefit of not needing to take soil samples, because the pH is tested right in the ground.
How to Test Directly in Soil
- Using an auger or ruler, first put a hole down into the soil. The hole needs to be the same depth each time you test to avoid pH discrepancies.
- Add some distilled or deionized water to the hole; the soil should be damp but not saturated with water.
- Insert your testing instrument into the hole, and allow for the reading to develop or stabilize.
Simple!
Soil pH Testing Options
Now that we have gone over soil and how important pH is, let’s talk about what you can use to test your soil pH. We've narrowed it down to four main groups: test strips, chemical test kits, digital pocket testers, and portable meters.
pH Test Strips
Pros: Easy to use, inexpensive
Cons: Hard to read, loss of precision, hidden costs
pH test strips (aka litmus paper) are paper strips that have been saturated with pH-sensitive dyes. When exposed to a damp substance, the strips will change color relative to that substance’s pH. This color change corresponds to a color chart provided with the test strips. This method for testing is quick, easy, and inexpensive, but it does have some disadvantages.
Soil is very dark in color, even when mixed with water. The muddy color could stain the test strips and make them hard to read. Even when a color change can be seen, it's subjective since colors can look different depending on the lighting, as well as from person to person. This leads to inconsistent and poor results.
Tests strips will not give the most accurate test results either; they only have a resolution of 0.5 pH units. This means the closest your test results can get to your soil's true pH would be 0.5 pH +/-. Being 0.5 pH units off means a greater cost to treat the soil. If the soil treatment is not accurate you can have low crop yield and dead plants.
Soil pH Chemical Test Kits
Pros: Easy to use, all-inclusive
Cons: Multiple kits needed, hard to read & dispose of, limited number of tests
pH chemical test kits are like test strips in that they are easy to use, but also have several drawbacks.Using a soil test kit involves adding your soil, distilled or DI water, and some chemicals (these will be included when you purchase a kit) to a tube. The chemicals, like test strips, react with the pH levels in your sample to create a color change. Also like test strips, the color change of the test kits will be subjective, and readings will vary between different people. pH test kits have lower resolution, generally between 1 or 0.5 pH points, and tend to test specific ranges of pH. That means you need to buy many kits to test your different types of soil, or when you are just beginning and don't know your starting pH.
The number of tests you perform with a chemical test kit limited to the number of reagents included. Regular kits include enough chemicals for anywhere between 1 and 10 tests. Disposal of these chemicals poses another issue; chemical compositions differ from manufacturer to manufacturer, and many cannot just be poured down the drain or into the trash.
Digital Soil pH Pocket Testers
Pros: Pocket size, better accuracy, easy to keep clean
Cons: Need to know how to care for the device
Soil pH pocket testers are digital, portable testing instruments that utilize a pH electrode. The integration of a pH electrode in the durable casing of a tester allows for much greater accuracy than test kits or strips. The pH electrode takes a pH reading in your soil or soil slurry and displays it on an LCD screen. Testers have fewer things to interfere with taking a reading compared to test kits and strips. You no longer have to worry about the dark soil sample interfering with color change, or the subjectivity of color change tests in general. Many testers also have a much higher resolution and accuracy than chemical options, generally between 0.1 and 0.01 pH units.
Hanna Tip: Testing more than pH? Some testers can test other things as well, such as conductivity.
Soil pH testers allow for easy testing out in the field, with simple, single-handed, one- or two-button functions. Some testers have special features like waterproof capabilities or durable bodies which let you test in humid environments without affecting the readings.
Certain pocket testers also feature a cloth junction, which helps prevent clogging of the electrode. To unclog soil particles from the junction, the cloth can be gently tugged with tweezers to remove debris and uncover fresh cloth in the junction. This gives you more accurate readings and a longer electrode life.
As the temperature changes, the way the electrode behaves will also change; this can affect your pH readings. To help counter this, some pH soil testers have automatic temperature compensation, a feature that allows the device to correct the error.
These handy instruments do take a little bit more know-how to operate and properly care for. You'll need solutions to keep the electrode calibrated, hydrated, and cleaned. More information on care for a pH electrode can be found under Care and Maintenance below.
Hanna Tip: On some soil pH testers, it can be hard to tell if the pH readings have stabilized. Look for a tester that features a stability indicator for an easier testing experience.
Portable Soil pH Meters
Pros: Portable laboratory accuracy, customizable, no more guesswork
Cons: Larger investment, more technical
Portable soil pH meters are the next step up from soil pH testers. They are a convenient way to have laboratory accuracy in field testing. A bit larger than the testers, portable soil pH meters offer many functions from multiparameter testing to data logging.
All choice portable soil pH meters have automatic temperature compensation; they will come with either an integrated temperature sensor, or a separate temperature probe. Portable soil pH meter measurements are nearly exact, with resolutions as low as 0.001 pH units. Both of these functions give you readings with much greater accuracy.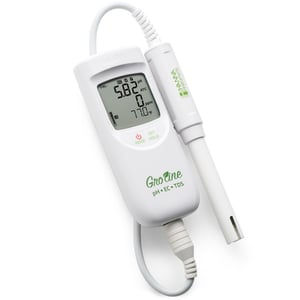 If you need to report your pH values, a portable soil pH meter is a great choice. Some of these meters are able to provide Good Laboratory Practices (GLP) data, which includes things such as date, time, calibration data, and logged data. This gives traceability to your readings.
Hanna Tip: Many electrode choices make portable soil pH meters a versatile testing option. Some are even waterproof!
Certain soil pH meters come with an electrode diagnostics feature called CAL Check™. The meter will check the condition of the electrode and pH buffers during calibration. Some of these meters also come with a HELP button which will bring up tutorials right on the screen.
Looking for something smaller than a typical portable soil pH meter, but need the accuracy of one? Some of the portable soil pH meters do not even need a regular meter! There are electrodes on the market that can wirelessly link to a smartphone or tablet.
Hanna Tip: Like a tester, the electrodes will need some upkeep to give them a long working lifespan. You will need calibration, cleaning, and storage solutions. More information on care and maintenance is next!
Care & Maintenance of Your Soil pH Electrode
Proper care and maintenance of your pH electrode is essential. Appropriate care of electrodes will extend its useful life. Our maintenance motto will help you to remember the three main concepts in electrode maintenance: Clean Regularly, Calibrate Often, and Condition Always.
Clean Regularly
When testing the pH of soil, it's important to properly clean the pH electrode since soil can clog the junction. If soil gets stuck on the electrode, do not wipe it! Instead, rinse the electrode with distilled water.
Is the soil really sticking to the electrode? Soak it in a cleaning solution specially formulated for soil or humus deposits. Both solutions help to remove residue left behind after rinsing the electrodes with distilled water. The cleaning solution for soil deposits is great for general agricultural samples; the humus solution is best highly organic soils (such as compost). Cleaning the electrode will give you maximum efficiency and accuracy when taking pH readings. After using a cleaning solution, the electrode should be placed in storage solution for at least one hour before using it again. The cleaning solutions are available in disposable one-use-only packets as well as bottles.
Electrode Cleaning Steps
- Fill a squeeze bottle or spray bottle with deionized (DI) or distilled water.
- Using the bottle, rinse down the electrode with the water.
- Gently shake down the electrode to remove residual water.
- The electrode is ready for use or storage!
- Further Cleaning:
- Rinse the electrode with DI or distilled water.
- Let the electrode soak in cleaning solution for at least 15 minutes. Use a cleaning solution formulated for soil deposits or humus deposits.
- Remove the electrode from the cleaning solution.
- Rinse the electrode with DI or distilled water.
- Place the electrode in storage solution for at least 1 hour before using it again.
Calibrate Often
Calibrating your electrode will give you the greatest accuracy when testing pH. Calibration will help to correct your electrode as its response changes over time, due to aging and other factors.
Electrode response changes due to several factors. It's important to calibrate to at least two pH points which bracket your expected pH value. Bracketing simply means calibrating to one pH point below the expected range, and one pH point above the expected range. (For example, if your expected reading is pH 8.6, then pH 7 and pH 10 buffers should be used.)
Hanna Tip: Daily calibration is recommended, but if you can tolerate a little bit of error in your measurement, it is not completely necessary – though still highly recommended!

Electrode Calibration Steps
- Use a spray or squeeze bottle and rinse down the electrode with DI or distilled water.
- If using a disposable one-use-only packet of pH buffer, tear or cut open the packet.
- Enter calibration mode on your soil pH meter.
- Insert the electrode until the bulb and junction on the side of the electrode are covered by the buffer.
- Let the reading stabilize and accept the buffer.
- Remove the electrode from the buffer and rinse it again.
- Repeat these steps for the other pH buffers.
- When finished, exit calibration mode.
- If using a bottle of pH buffer, pour the buffer into a clean beaker and place a magnetic stir bar in the beaker.
- Place the beaker on a stir plate to keep the buffer stirring while taking a measurement.
- Enter calibration mode on your soil pH meter.
- Insert the electrode until the bulb and junction on the side of the electrode are covered by the buffer.
- Let the reading stabilize and accept the buffer.
- Remove the electrode from the buffer, and rinse it again.
- Repeat these steps for the other pH buffers.
- When finished, exit calibration mode.
Hanna Tip: Fresh pH buffers are recommended every time you calibrate an electrode. This will give you the best possible calibration.
Condition Always
The most important part of the pH electrode is the sensing bulb at the bottom. The bulb is made of glass that is sensitive (responsive) to hydrogen ions. It's important to maintain equilibrium in the electrode to keep your readings stable by keeping the bulb hydrated.
Proper hydrating means always storing your electrode in storage solution. Storage in other liquids, like distilled or DI water, can damage the glass bulb and cause slow, inaccurate pH readings.
Hanna Tip: Damage from improper storage may be repaired in a refillable electrode by filling it with fresh electrolyte, then rehydrating it in storage solution. This should bring the electrode back to equilibrium, though it's not a guarantee.
Electrode Conditioning Steps
- Rinse the electrode with distilled or deionized water.
- You can use either a disposable one-use-only packet of conditioning solution, or a beaker with some of the solution poured into it.
- Place the electrode in the conditioning solution. (It's important to make sure the junction on the side of the electrode is covered by the conditioning solution. Both the pH glass bulb and the junction need to be hydrated for the probe to work!)
- Let the pH electrode sit in conditioning solution from an hour to overnight to completely rehydrate.
Looking for more pH testing tips? For more information on pH electrode care, check out our pH Best Practices Checklist, and our blog on the Top 10 Mistakes in pH Measurement.
Soil may be complex but...
...testing your soil’s pH doesn’t have to be! The options for testing pH are as diverse as the different types of soils. For help in choosing the best option for your testing needs please contact us using one of the channels below.