The team at Hanna Instruments has seen a lot of good (and bad) pH measurement practices. Because of this, we’ve compiled a list of the top 10 mistakes in pH measurement as well as our advice on how to fix them.
Top 10 mistakes our technical staff see most often
- Storing the Electrode Dry
- Wiping the Sensing Glass
- Storing the Electrode in DI Water
- Not Cleaning the Electrode
- Calibration Errors
- Improper Electrode Selection
- Not Loosening or Removing the Fill Hole Cap
- Low Electrolyte Fill Level
- Inadequate Probe Submersion
- Using an Old or Expired Electrode
Mistake #1: Storing the Electrode Dry
A pH electrode’s sensing glass is composed of three discrete glass layers: a hydrated outer glass gel layer, a dry middle layer, and a hydrated inner layer. The hydrated layers are responsible for giving the electrode the sensitivity needed to detect changes in pH and by drying out the electrode, you severely reduce its sensitivity.
This leads to drifting pH values, slow response times, and incorrect values. Fortunately, in most cases, you can revive a dried out electrode by submerging the bulb and junction in pH storage solution for at least an hour. After that, you can calibrate the electrode and get back to testing.
Mistake #2: Wiping the Sensing Glass
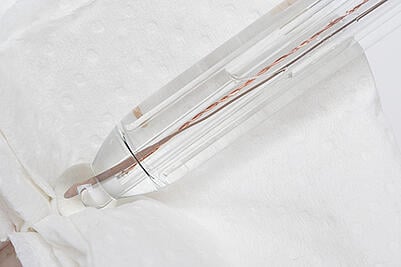
An electrode sends a voltage to your meter that is based on the pH of the sample it is submerged in. Wiping the pH glass can produce a static charge which interferes with the voltage reading of the electrode. When the voltage reading is wrong, the pH value that the voltage is interpreted as is thrown off too. In addition to this, the hydrated layer of glass that you have worked to develop by proper storage is interrupted.
Instead of wiping the electrode sensing glass, simply rinse the electrode with distilled or deionized water. If necessary, you may blot the electrode with a lint-free paper towel (e.g. Kimwipes®) to remove excess moisture, but be extra careful not to rub the surface of the glass.
Mistake #3: Storing the Electrode in Deionized Water
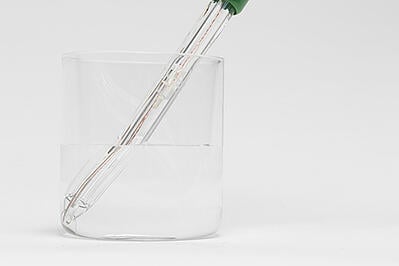
Using pure water (such as deionized, distilled, or reverse osmosis) is also a major mistake when storing your pH electrode.
Deionized water contains virtually no ions and the pH electrode is full of ions, both in the filling solution and in the hydrated portion of the pH sensing glass. When an electrode is submerged in a solution that has no ions, the ions in the electrode will want to move out into the solution in an attempt to establish an equilibrium. Over time, most of the ions will leave the electrode, rendering it useless. The glass will also degrade much faster, leading to shorter electrode lifespans.
If you ever encounter an electrode stored in deionized or distilled water, immediately remove it. If the electrode is refillable, replace the fill solution. Once the fill solution is changed, store the electrode in the storage solution and calibrate it.
Mistake #4: Not Cleaning the Electrode
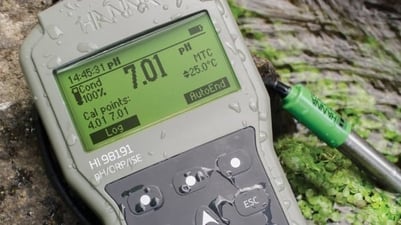
Cleaning is just as important as calibration when it comes to attaining accurate pH measurements. This is because deposits that form on the electrode coat the sensing glass. As a result, you will be measuring the deposits and the sample, rather than just the sample.
A slow response time can also happen with dirty electrodes. You might even record the value when it appears stable, but in reality, it's drifting very slowly to the real value. Even if the electrode appears clean; a very thin coating of oil or scale may be present, but not visible.
The best way to clean the electrode is to use a specially formulated cleaning solution for pH electrodes. An even better suggestion would be to use one that is developed for the application you are using the electrode for. For example, cleaning solutions are available for removing wine deposits/stains or even fat deposits from electrodes. By using these formulated cleaning solutions, you can be confident that residues are completely removed from the electrode.
Mistake #5: Calibration Errors
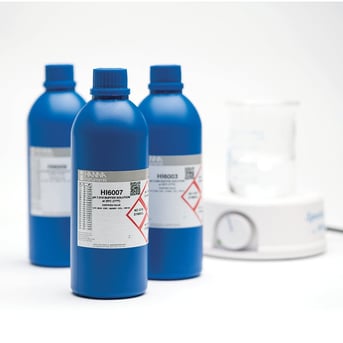
Calibration and which buffers to use are definitely the most common processes we get asked about.
For best results, you should make sure you are calibrating using buffers that bracket your sample. A pH 7 buffer should always be included to obtain the offset (neutral) point. This means that if your sample is pH 8.6, then pH 7 and pH 10 buffers should be used.
The frequency of calibration ultimately depends on how accurate you like your numbers. Daily calibration is ideal; however, if you can tolerate a little bit of error in your measurement, daily calibration is not completely necessary but is still highly recommended!
Video: Top 10 pH Mistakes You Want to Stop Making Right Now
Mistake #6: Improper Electrode Selection
All pH electrodes are not created equal. This is because some electrodes are better suited for certain applications than others. Using the less-than-ideal electrode can result in a longer response time and a shorter electrode lifespan.
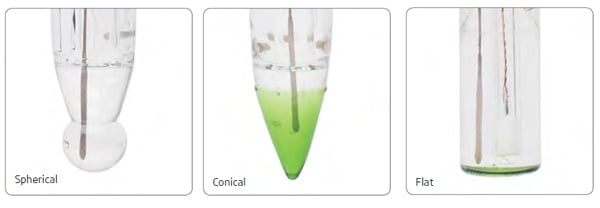
It's best to use an electrode that is especially suited for the specific kinds of samples you are testing. Conical sensing tips with open junctions allow direct measurement of solid and semisolid samples, eliminating the need to make a slurry. Electrodes with multiple ceramic junctions allow electrolytes to diffuse into the sample faster, allowing more stability in pH measurements of samples with low-conductivity.
Mistake #7: Not Loosening or Removing the Fill Hole Cap
Most modern pH electrodes are technically two electrodes in one: a sensing electrode and a reference electrode.
The reference electrode requires a slow but steady flow of electrolyte out of the electrode and into the solution. When the electrode fill hole cap is screwed on tightly, electrolyte cannot easily diffuse out of the electrode and into the solution. This results in an erratic reading that might never stabilize in a reasonable amount of time.
Fortunately, the fix for this mistake is simply loosening or removing the fill hole cap.
Video: Why Keep the Reference Fill Hole Open During a pH Measurement?
Mistake #8: Low Electrolyte Fill Level
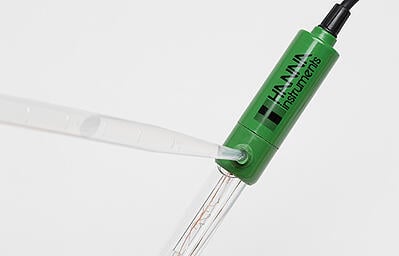
Refillable electrodes allow you to replenish the electrolyte in the reference compartment once it begins to run low. However, if you do not replenish the electrolyte from time to time, your pH measurements can be impacted. Erratic electrode response is the most common problem with inadequate electrolyte levels.
Electrolyte flow from the reference junction permits the completion of the measuring cell. Ensure that your electrode is replenished and functional by maintaining the fill solution level less than a half-inch from the fill hole cap.
Video: Filling the Electrode
Mistake #9: Inadequate Probe Submersion
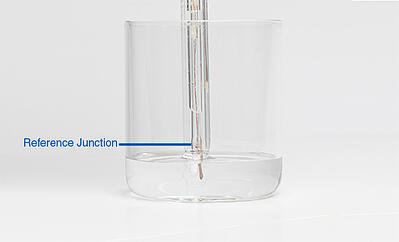
The pH sensing portion and reference junction needs to be completely immersed in order to properly function. A pH sensor works because the sensing glass interacts with the sample and produces a voltage that gets compared with the reference electrode (which is stable in all samples). Without one of these portions in complete contact with the sample, the measuring system is incomplete, leading to erroneous values.
Submersion problems are easily corrected by adding enough sample to submerge both the junction and sensing glass.
Mistake #10: Using an Old or Expired Electrode
As electrodes age, the sensing portion of the glass will break down and become less responsive than it was when it was new. Eventually, your electrode will stop responding adequately to changes in pH.
There are some numbers associated with properly functioning electrodes. Slope and offset are familiar metrics that you can use to measure your electrode’s functionality. These numbers can be determined during calibration.
Sometimes, despite all of your best efforts, the electrode still does not perform like you would like it to. If the electrode is old, it might just be time to replace it.

Although this seems like a lot of steps to keep track of in order to take measurements, many Hanna Instruments meters offer CAL Check™. Hanna's CAL Check compares electrode slope and offset data from calibrations made over time. It immediately identifies potential problems with the electrode and/or buffers using built-in diagnostics.
These diagnostics will alert you to any possible errors associated with dirty electrodes and contaminated buffers, as well as determine overall electrode condition after each calibration. CAL Check takes the guess work out of pH calibration, allowing you to be confident that your electrode is in good working condition and ready to take accurate measurements.
That's why we've dedicated our blog as a helpful resource for you to use! Catch up on the latest products, explore industry trends, discover testing tips, learn how to improve results, and more. Got questions? Email sales@hannainst.com.


