 Turbidity is one of the most common and intuitive qualities of water. One of the first things we notice about water is how cloudy it is (or isn't). However, behind the cloudiness lies some important implications. Turbidity can affect everything from how water is disinfected, to the quality of our lakes, oceans, and streams.
In this guide, we’ll walk through what turbidity is, reasons why it is measured, options for testing, and tips to get the most accurate results.
- What is Turbidity?
- Choosing a Turbidity Meter
- Turbidity Standards
- Six Tips for Accurate Turbidity Measurements
What is Turbidity?
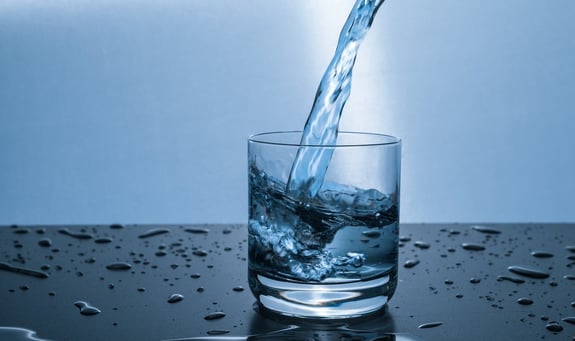
At its simplest form, turbidity is just the cloudiness of water. The cloudiness typically comes from particles that are suspended in the water that we can’t see individually. These particles could be algae, dirt, minerals, proteins, oils, or even bacteria.
Turbidity is an optical measurement that indicates the presence of suspended particles. It's measured by shining light through a sample, and quantifying the suspended particle concentration. The more particles that are in a solution, the higher the turbidity.
It’s important to note that while turbidity correlates with suspended solids, measuring turbidity is not the same as measuring total suspended solids (TSS). TSS measurements are gravimetric, which quantifies the mass of the solids suspended in a sample, performed by weighing the separated solids.
Importance of Turbidity

Turbidity is a benchmark water quality parameter across all environments, from the municipal drinking water facility to environmental monitoring.
The primary goal of drinking water treatment is to remove and reduce turbidity. Throughout the treatment process, turbidity is measured at multiple stages to determine treatment efficiency and to ensure compliance with government regulations. Suspended matter (soil, algae, etc.) in water reduces effectiveness of disinfecting chemicals and can act as carriers for bacteria and parasites.
These suspended particles are indicated by water that appears slightly cloudy and has a high turbidity value. Even without turbidity reducing the effectiveness of chlorination, overall water clarity is an indicator of quality, reassuring the consumer of its safety. After all, nobody wants to drink cloudy water from the tap!
Turbidity has wide-reaching importance in environmental monitoring, where the cloudiness of water can indicate pollution. For example, after storm events, the runoff from agriculture, logging, and construction sites can rapidly flood natural waters with sediment. This can disrupt aquatic life that dwells on the bottom of the water, which would require dredging to remediate.
The impact of construction sites is so significant that the United States Environmental Protection Agency (USEPA) requires many construction sites larger than one acre to monitor turbidity after major storm events to ensure that they comply with their permits.
Outside of drinking water, wastewater, and environmental use, measuring turbidity is useful in wineries, as well as other places across the food and beverage industry.
How is Turbidity Measured?
There are many methods to measure turbidity. As a measurement of how cloudy water is, we can use everything from visual methods to full-scale meters to quantify it.
Some visual methods are ideal for quick field environmental use, such as the Secchi disk. This consists of a disk that is lowered into water until it's no longer visible. The depth at which the disk is not visible is the Secchi depth. This method is subjective and works best in slow-moving, low turbidity natural waters.
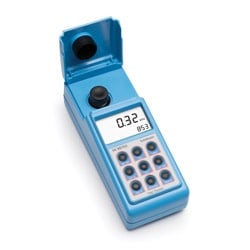
The best way to measure turbidity in a wide variety of samples is with a nephelometer, also known as a turbidity meter. Turbidity meters utilize a light and photo detector to measure light scatter, and read out in units of turbidity, such as nephelometric turbidity units (NTU) or formazin turbidity units (FTU).
How Do We Reduce Turbidity?

Most efforts to reduce turbidity are directed at prevention in runoff events. However, drinking water and wastewater plants treat raw water to reduce turbidity. Regulations are set in order to guarantee safe drinking water and process efficiency. One of the first steps in the drinking water treatment process is to remove suspended particles from the water.
To achieve clarification, the water is mixed with a coagulant, such as alum. The soil and other particles have a negative charge and repel each other, resulting in dispersed fine particles. The addition of alum neutralizes the suspended material so that the particles gather together to make up larger particles, known as ‘floc.' The water is then passed through a sedimentation basin, where filter media remove the floc.
If the raw water is naturally less turbid (typically groundwater) then the sedimentation process may be shortened, saving time and money. After most of the dissolved particles are removed, the water is passed through a final filter that removes up to 99.5% of the remaining suspended solids.
The USEPA requires that 95% of drinking water in a one-month period have a turbidity reading of less than 0.5 NTU, and that no samples exceed 5 NTU at any given time.
Choosing a Turbidity Meter
Turbidity meters are devices that have a light source, lens, and detector located 90° from the light source that work together to measure the turbidity of a sample. When a sample of is placed into the path between the light source and detector, some of the particles in the sample scatter the light in such a way that it reaches the detector at 90°. The detector determines the amount of light scattering and compares the reading against standards on a calibration curve.
Some meters incorporate another detector at 180° to account for transmitted light. This can help with samples that have high turbidity to correct for lost light due to attenuation and backscatter (reflection). Turbidity measurements at 90° and 180° are called the ratio method.
Once you have your meter, taking turbidity measurements is easy and involves just a few simple steps:
- Calibrate the meter with standard cuvettes.
- Fill a cuvette with your sample.
- Clean the outside of the cuvette and if working with samples with very low turbidity, use silicone oil on the outside of the cuvette.
- Place the cuvette inside the meter and take your reading.
Turbidity Standards
The turbidity standards are an equally important portion of the measurement. Most modern turbidity standards are made from formazine, a synthetic polymer with a uniform particle size. The polymer is made from hydrazine and hexamethylenetetramine. The consistency of this compound has led to its adoption by nearly all standards organizations, such as ISO, EPA, and ASBC. A suspension of 1.25 mg/L hydrazine sulfate and 12.5 mg/L hexamethylenetetramine in water has a turbidity of one Formazin Turbidity Unit (FTU).
Most other turbidity units are based on FTUs, but vary based on the method they use. There are many different units, but here a few examples:
- Nephelometric Turbidity Units (NTU): Unit that is equal to FTU but measured using a turbidity meter design that complies with EPA standards.
- Nephelometric Turbidity Ratio Unit (NTRU): EPA-based unit that uses the ratio method of determining turbidity.
- Formazin Nephelometric Units (FNU): equal to FTU but measured using ISO 7027 standards for the meter design
- American Society of Brewing Chemists (ASBC-FTU): Uses ASBC standards for the design of the turbidity meter.
It's important to decide which method you are likely to comply with when choosing a turbidity meter. Many different turbidity meter designs exist, but two are the most common: those that comply with EPA 180.1 and ones that comply with ISO 7027.
It is important to note that meters are not individually approved by these method bodies. Instead, they simply conform to the requirements set by these standards.
EPA-Compliant Turbidity Meters

EPA-compliant meters comply with standard method 180.1, the standard for determining turbidity in drinking, ground, surface, waste, and seawater samples. It performs best in a range of 0-40 NTUs, making it ideal for low range samples.
In addition, these meters have the following requirements (Excerpt from Methods for the Determination of Inorganic Substances in Environmental Samples):
- Tungsten lamp light source operated at a color temperature between 2200-3000°K.
- Distance traversed by incident light and scattered light within the sample tube: Total not to exceed 10 cm.
- Detector: Centered at 90° to the incident light path and not to exceed ±30° from 90°. The detector, and filter system if used, shall have a spectral peak response between 400 nm and 600 nm.
- The sensitivity of the instrument should permit detection of a turbidity difference of 0.02 NTU or less in waters having turbidities less than 1 unit.
Based on these requirements, EPA-compliant meters are:
(+) Great for low range measurements, such as drinking water
(+) Comply with EPA standards for reporting use
(–) Perform poorly with colored samples due to absorbance of white light
ISO-Compliant Turbidity Meters
Meters that conform to are the next most common style of turbidity meter. These meters have similar requirements to EPA but have a few key differences:
- The wavelength for the “light” source must be an infrared 860nm LED. Note that this is technically not visible light, but rather infrared radiation (IR).
- The spectral bandwidth of the incident radiation shall be less than or equal to 60 nm
ISO-compliant meters also have light detectors at approximately 90° from the radiation source, although the method also supports the use of detectors at other angles to determine the amount of light that is attenuated by the sample (i.e. at 0°). Overall:
(+) ISO meters use an infrared LED, which eliminates interference by sample color
(+) Support for ratio method allows for higher accuracy in higher turbidity samples
(–) Not acceptable by the US-EPA for reporting purposes
No matter what type of meter you choose, be sure to consult any regulatory agencies if turbidity values are for reporting purposes. Both meter styles can use formazin standards or AMCO-AEPA-1, a commercially available standard.
Six Tips for Accurate Turbidity Measurements
Now that you know how to take measurements and what kinds of meters are out there, we’ll cover some of the best practices for testing turbidity:
1. Start with good cuvettes

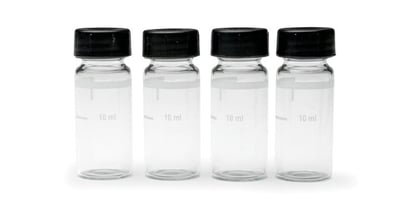
As we’ve covered, when we measure turbidity we are measuring the cloudiness of a sample that’s caused by suspended solids. To do this, we need to have a vessel to contain our sample. Just like with colorimetric tests for chlorine or COD, we use cells, or cuvettes, to contain our sample.
Cuvettes are a critical part of the equation because the light passes through them just like the sample. Make sure that your cuvettes are clear and free from any scratches. Scratches will interfere with the way light passes through the glass, leading to falsely high results.
Fortunately, fixing this is as easy as replacing any cuvettes that are stained or show visible scratches.
2. Oil your cuvettes
Just as visible scratches and imperfections in the glass can affect your turbidity readings, small imperceivable blemishes can also affect your turbidity results. These seemingly microscopic scratches are especially relevant if you measure samples in the lower range, as with drinking water.
Silicone oil can be used to mask minor imperfections in the glass. Silicone oil has the same refractive index as glass so it will not interfere with readings. Simply take a few drops of oil, add it to the cuvette, and then wipe the cuvette thoroughly with a lint free cloth. Once done correctly, you should have a cuvette that seems virtually dry with no visible oil.
It is important to note that the silicone oil is only effective at filling minor imperfections in the glass. Large, visible scratches should be seen as a sign to replace the glass.
3. Using Fresh Turbidity Standards
 We can all agree that the key to accurate results is an accurate calibration which comes from reliable standards.
Although modern formazin-based standards are more stable and reliable than ones used historically, they are still perishable. EPA methods state that formazin stock standards (at 40 NTU) made in-house should be prepared monthly and that any dilutions from this standard must be prepared daily. Afterwards, the formazin standards have a tendency to coagulate and settle to the bottom of the container.
To save time, look for AMCO-AEPA-1 primary standards that are commercially available and fit your meter. Ideally, these standards should come as a kit in pre-sealed vials that you can easily place in the cuvette. The AMCO standards are also much more shelf-stable than the homemade formazin standards, allowing years of use (about 3 years). Look for ones with a certificate of analysis (COA) and expiration date for peace of mind.
4. Cleaning the Cuvette
Stains on the cuvette can absorb light or scatter it, resulting in a turbidity measurement of your dirty glass and your sample. It’s critical that turbidity cells are especially clean.
If stains form on the glass, use a dilute acid or other cleaner to remove stains. Once clean, be sure to rinse your turbidity cells with turbidity-free water, such as high purity deionized water filtered through a ≤ 0.2 µm filter membrane.
5. Using the Ratio Method
As the suspended particles in a sample increase, the sample tends to scatter as well as absorb and reflect light. This “lost” light can cause turbidity measurements to read differently from the actual value.
You can solve the problem of high turbidity samples in two ways. One way to do this is by diluting any highly turbid samples with turbidity-free water. Once diluted, the samples are measured as normal and then corrected for with a dilution factor. EPA 180.1 requires dilution for for any samples above 40 NTU prior to measurement.
Another way to compensate for light that’s backscattered or attenuated is to use the ratio method. Many meters are equipped with other detectors are various angles to determine and compensate the lost light. Designs using these methods are compliant with Standard Method 2130B and USEPA Interim Enhanced Surface Water Treatment Rule.
6. Avoid Condensation on Your Cuvettes
Over time, condensation can form on the glass, especially if your samples are cold. Condensation on the exterior of the glass obscures the light from your samples, causing erroneous turbidity readings.
You can avoid this altogether by simply wiping down your cuvettes periodically with a clean, lint-free cloth. Oiling the cuvette helps to reducing condensation, but it is important to be mindful of this seemingly minor detail.
That's why we've dedicated our blog as a helpful resource for you to use! Catch up on the latest products, explore industry trends, discover testing tips, learn how to improve results, and more. Got questions? Email sales@hannainst.com.


