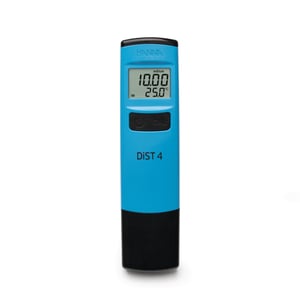
 Having trouble with your conductivity (EC) measurements? It’s easy to make mistakes, especially if you’re unfamiliar with exactly how a technology works. Problems that come up when testing for EC often have a lot to do with the type of probe you're using.
Knowing which conductivity probe you have makes it easier to figure out the problem you may be experiencing. If you look at the probe and see two graphite or stainless steel pins or plates, that's a two electrode probe; a single probe with four rings on it is potentiometric; and a conductivity probe that is used with process equipment and has a circular loop at the end is inductive.
After you've identified which type of conductivity probe you are working with, you will be able to easily figure out which of these eight problems you may be having.

- Probe Polarization
- Fringe Field Effect
- Improper Probe Calibration
- Contaminated Sample
- Wrong TDS Conversion Factor
- Not Fully Submerging Your Probe
- Using the Wrong Conductivity Probe
- Not Using Temperature Compensation
Problem #1: Probe Polarization
Is your conductivity meter reading lower than it should? When a charge builds up on the sensors of a two electrode probe readings become inaccurate. This can happen with any two electrode probe, but it's most common with ones that have stainless steel pins.
The solution to this problem is to use a conductivity meter with graphite sensors, because they're less reactive. These conductivity meters use alternating current frequencies and cell constant combinations that work best within a certain range, so they minimize the effects of polarization.
Hanna Tip: When choosing a conductivity meter, make sure that it can measure the expected concentration of your sample.
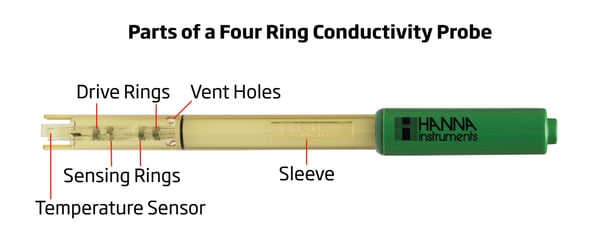
If you generally measure samples with a wide range of conductivities, using a four ring probe will also help avoid polarization effects. The four ring probe consists of two inner sensing electrodes and two outer drive rings. (See diagram below.)
The drive rings are powered by an alternating voltage that supplies a current to the cell. The voltage drop is then measured by the sensing electrodes. Since these conductivity probes measure the voltage rather than the current, issues with probe polarization are minimized and accuracy is improved.
Problem #2: Fringe Field Effect
Are your measurements sometimes erratic? If you're using a four ring probe the reason could be as simple as its positioning in the beaker. Holding the probe too close to a solid object can result in what is called fringe field effects.
This means that the electrical field generated by the probe (the same electrical field used to measure conductivity) is being interrupted by another object, such as the sides of your container. Metals will create a positive interference, meaning your results will read too high. Glass and plastics will give you a reading that is too low.
This issue is an easy fix – just make sure your conductivity probe isn’t too close to the sides or bottom of your container! We recommend measuring at least one inch away on all sides.
Problem #3: Improper Conductivity Probe Calibration
Conductivity calibration solutions have no buffering capacity, which means any deionized (DI) water or sample that remains on the probe will change their values.
Since using an accurate calibration solution is necessary for accurate measurements it's important to be sure your solution isn’t contaminated.
The easiest way to avoid contamination is to prime the probe with your calibration solution. In other words, dip your clean conductivity probe into a "rinse" solution. After that, you can go ahead and calibrate with fresh solution.
You also want to be sure to use fresh calibration solution every time you calibrate. One option guarantee this is to use individual packets of calibration solution. 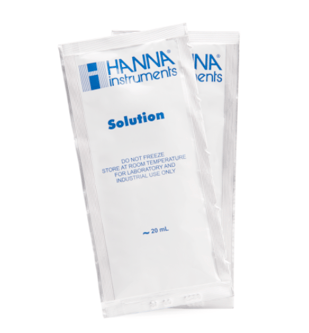
If your meter accepts various calibration solutions you should be using one that is similar to the concentration of your sample. Your conductivity meter doesn’t need to be calibrated as frequently as a pH electrode, but it is important to periodically check the conductivity probe, becuse calibration compensates for changes in the probe over time due to buildup and/or damage.
Hanna Tip: The most common calibration solution for conductivity is 1413 µS/cm. However, checking your meter's manual is the best way to determine which calibration solution you should use. Some meters only calibrate to specific points.
Learn More About the Different Types of Calibration Solutions
Problem #4: Contaminated Sample
To make sure that you don’t accidentally change the conductivity in your sample, prime your probe with a "rinse sample" before testing. This relates to the last problem regarding calibration solutions and how they can be affected when contaminated; the same goes for your sample, especially if it has a low conductivity.
After you've done that, discard the rinse sample and perform your measurement with a new, fresh sample. This way you ensure your sample was the last thing on the probe, and you aren’t adding or diluting any ions.
Hanna Tip: Be mindful about cleaning and rinsing your probe after use. This helps wash off any residual sample on the sensors, keeping it clean for future measurements.
Problem #5: Wrong TDS Conversion Factor
Total dissolved solids (TDS) is strongly related to conductivity. This is because as the amount of dissolved ions (e.g. calcium, nitrate, potassium, etc.) increases, conductivity increases as well.
Measuring TDS with a conductivity meter is an easy way to find the concentration of dissolved solids in your sample. Conductivity readings are converted to TDS by a special conversion factor.
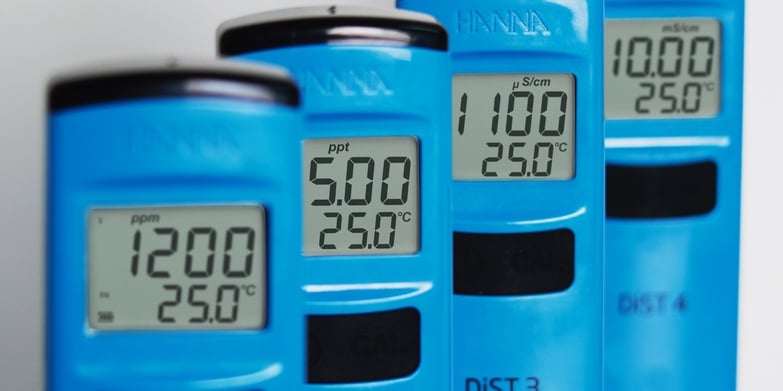
Using these conversion factors is easy. Simply take your EC measurement and multiply it by the conversion factor to get the TDS. Conductivity readings expressed as µS/cm can be converted to TDS in parts per million (ppm); EC expressed as mS/cm are converted to TDS in parts per thousand (ppt). 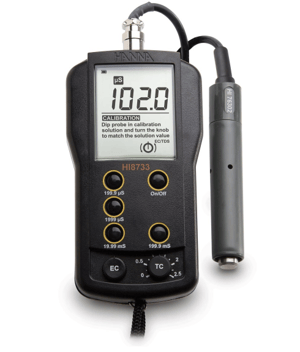
There are different conversion factors for every kind of ion. Some meters have only one conversion factor, while more advanced meters give you the option of programming your own.
The most commonly used conversion factors are 0.5 and 0.7. The 0.5 conversion factor is based off of sodium chloride (NaCl); the 0.7 factor is based off of a mixture of sodium sulfate, sodium bicarbonate, and sodium chloride. (These are in proportions of 40%, 40%, and 20% respectively, and is usually referred to as the 442 conversion factor.)
Conductivity meters with 0.7 factors are popular in agriculture and hydroponics because many nutrient and fertilizer manufacturers use this factor when setting optimal ranges of TDS. When choosing a meter for TDS make sure it has the right conversion factor for your application, or a selectable option.
Problem #6: Not Fully Submerging Your Probe
When taking a measurement your electrode should be completely submerged in the solution. This ensures that the reading you are getting reflects the conductivity of your sample. This step is especially important with four ring conductivity probes, because you will need a larger sample than with other probes in order to make sure that all four rings and the vent holes are fully submerged.
It's also important to make sure that no air bubbles are trapped in your probe if you're using a four ring or two electrode probe. This is easily fixed by gently tapping or shaking the probe while it's submerged.
Problem #7: Using the Wrong Conductivity Probe
Two electrode probes are designed with a cell constant based on your intended measurement range. Higher range measurements use a larger cell constant (the electrodes are further apart), while low range measurements need a smaller cell constant (electrodes are closer together) to measure the current. For this reason, Hanna testers with two electrode sensors come in different models for different ranges.
If you are testing a variety of samples, a four ring probe may be a better option for you. They are a good choice when you're working over a wide range and don't want to use multiple probes.
If you need a probe to work with process equipment, inductive conductivity probes stand up to harsher conditions. They have higher chemical resistance and are useful in industrial applications.
Problem #8: Not Using Temperature Compensation
An important factor that you should consider when shopping for a conductivity meter is temperature. Many meters feature automatic temperature compensation to ensure that the measurement is consistent over a range of temperatures.
When your sample is too far off from room temperature (25°C/77°F) the conductivity reading will be different. This is because as the temperature increases, the ions in the solution move faster. 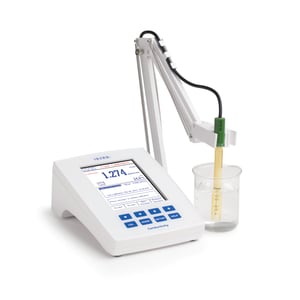
Meters with a temperature compensation feature make adjustments based on the temperature of your sample, providing a more accurate reading.
Hanna Tip: With samples that are much higher or lower than room temperature, make sure that the temperature sensor stabilizes before taking the measurement.
By following these tips and gaining a better understanding of how your conductivity probe works you should be able to improve your performance and get better results. If you are still having trouble with your readings, we're here to help! Just contact us using one of the channels below.
That's why we've dedicated our blog as a helpful resource for you to use! Catch up on the latest products, explore industry trends, discover testing tips, learn how to improve results, and more. Got questions? Email sales@hannainst.com.
