 Now is the time for spring cleaning (and not just of the house)! Spring cleaning can also apply to getting your garden beds and yards ready for planting and looking their best. When it comes to getting soil prepped, most people remember to turn the soil over, maybe add some nutrients, but what else? Then you remember, oh yeah, did the pH of my soil change? Good thing you bought that pH tester last year, but is it in good working order? Here are a few tips and tricks to keeping your electrode clean and in tip-top working condition.

Care & Maintenance of Your Soil pH Electrode
Proper care and maintenance of your pH electrode is essential. Appropriate care of electrodes will extend its useful life. Our maintenance motto will help you to remember the three main concepts in electrode maintenance: Clean Regularly, Calibrate Often, and Condition Always.
Clean Regularly
When testing the pH of soil, it's important to properly clean the pH electrode since soil can clog the junction. If soil gets stuck on the electrode, do not wipe it! Instead, rinse the electrode with distilled water.
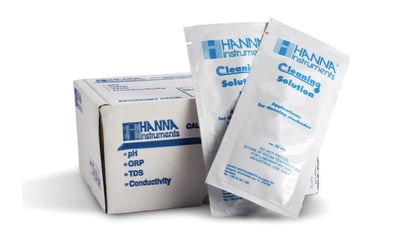
Is the soil really sticking to the electrode? Soak it in a cleaning solution specially formulated for soil or humus deposits . Both solutions help to remove residue left behind after rinsing the electrodes with distilled water. The cleaning solution for soil deposits is great for general agricultural samples; the humus solution is best highly organic soils (such as compost). Cleaning the electrode will give you maximum efficiency and accuracy when taking pH readings. After using a cleaning solution, the electrode should be placed in storage solution for at least one hour before using it again. The cleaning solutions are available in disposable one-use-only packets as well as bottles.
Electrode Cleaning Steps
- Fill a squeeze bottle or spray bottle with deionized (DI) or distilled water.
- Using the bottle, rinse down the electrode with the water.
- Gently shake down the electrode to remove residual water.
- The electrode is ready for use or storage!
Further Cleaning:
- Rinse the electrode with DI or distilled water.
- Let the electrode soak in cleaning solution for at least 15 minutes. Use a cleaning solution formulated for soil deposits or humus deposits.
- Remove the electrode from the cleaning solution.
- Rinse the electrode with DI or distilled water.
- Place the electrode in storage solution for at least 1 hour before using it again.
Calibrate Often
Calibrating your electrode will give you the greatest accuracy when testing pH. Calibration will help to correct your electrode as its response changes over time, due to aging and other factors.
Electrode response changes due to several factors. It's important to calibrate to at least two pH points which bracket your expected pH value. Bracketing simply means calibrating to one pH point below the expected range, and one pH point above the expected range. (For example, if your expected reading is pH 8.6, then pH 7 and pH 10 buffers should be used.)
Hanna Tip: Daily calibration is recommended, but if you can tolerate a little bit of error in your measurement, it is not completely necessary – though still highly recommended!
Electrode Calibration Steps
- Use a spray or squeeze bottle and rinse down the electrode with DI or distilled water.
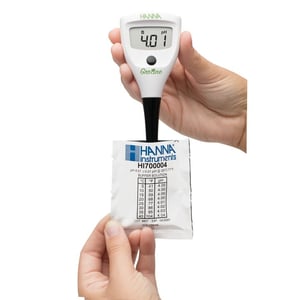
- If using a disposable one-use-only packet of pH buffer, tear or cut open the packet.
- Enter calibration mode on your soil pH meter.
- Insert the electrode until the bulb and junction on the side of the electrode are covered by the buffer.
- Let the reading stabilize and accept the buffer.
- Remove the electrode from the buffer and rinse it again.
- Repeat these steps for the other pH buffers.
- When finished, exit calibration mode.
- If using a bottle of pH buffer, pour the buffer into a clean beaker and place a magnetic stir bar in the beaker.
- Place the beaker on a stir plate to keep the buffer stirring while taking a measurement.
- Enter calibration mode on your soil pH meter.
- Insert the electrode until the bulb and junction on the side of the electrode are covered by the buffer.
- Let the reading stabilize and accept the buffer.
- Remove the electrode from the buffer, and rinse it again.
- Repeat these steps for the other pH buffers.
- When finished, exit calibration mode.
Always use a fresh pH buffer when you calibrate your electrode.
Condition Always
The part of the electrode that actually senses the pH is the glass at the tip of the electrode. The bulb or glass is responsive to hydrogen ions in your sample. It is important to maintain the equilibrium of your electrode by keeping the bulb hydrated in storage solution. Water or other liquids will strip the sensing ability of your ph electrode if it is stored in it. Storage in other liquids, like distilled or DI water, can damage the glass bulb and cause slow, inaccurate pH readings.
Hanna Tip: Damage from improper storage may be repaired in a refillable electrode by filling it with fresh electrolyte, then rehydrating it in storage solution. This should bring the electrode back to equilibrium, though it's not a guarantee.
Electrode Conditioning Steps
- Rinse the electrode with distilled or deionized water.
- You can use either a disposable one-use-only packet of conditioning solution, or a beaker with some of the solution poured into it.
- Place the electrode in the conditioning solution. (It's important to make sure the junction on the side of the electrode is covered by the conditioning solution. Both the pH glass bulb and the junction need to be hydrated for the probe to work!)
- Let the pH electrode sit in conditioning solution from an hour to overnight to completely rehydrate.
Looking for more pH testing tips? For more information on pH electrode care, check out our pH Best Practices Checklist, and our blog on the Top 10 Mistakes in pH Measurement.
Keeping soil balanced doesn't have to be a chore!
Keeping your pH electrode clean and in proper storage between uses can ensure that you have a working and accurate electrode each and every time you go to test. With so many options to choose from, please do not hesitate to reach out with any questions through any of the channels below, or sales@hannainst.com.
That's why we've dedicated our blog as a helpful resource for you to use! Catch up on the latest products, explore industry trends, discover testing tips, learn how to improve results, and more. Got questions? Email sales@hannainst.com.


