An Introduction to the Winery Lab
The wine lab. Often the part of the production process overlooked or given the short straw when it comes to outfitting a production winery. Emphasis is usually placed on being able to run a few given tests with lip service paid to accuracy and precision. Meanwhile, the cellar generally gets top billing to optimize the winemaking process. Granted, most winemakers understand the need for a winery lab, and place value on the results which the lab produces. Yet, in general the industry tends to lack a critical eye on wine analysis the way many other industries do. We’re blessed by the fact that our end product is a resilient tank which can take somewhat of a beating and still be a rather pleasing product for our end users. When wine spoils, it only tastes bad, it won’t make you physically ill unlike in other industries.
The wine lab is a critical part of the production process that is beyond a winemaker’s sense of taste and smell. The lab is the primary source of quality control in the winemaking operation. Lab results are the feedback mechanism to drive decision making in the cellar. Do you need to make an addition or adjustment to the wine? How much of the addition should you add? Did the addition hit the target? Did the adjustment give the desired outcome? These are the questions that proper lab analysis answers. If the lab is incapable of performing these tests, or even worse, is performing them incorrectly, then the production process suffers. In that case, the only thing between you and batches of spoiled wine is the product’s natural resiliency. A strong lab producing accurate and precise measurements gives winemakers a powerful tool to take command of their quality control process and drive success in the cellar versus being along for the ride.
First, let's go over the basics. (Or use one of the links below to skip to a topic!)
- Does Your Wine Analysis Have Meaning?
- Map Your Wine Testing to the Stages of Winemaking
- The Standard Wine Lab
- Building Your Wine Lab Testing Map
- Wine Analysis: In-House vs. Outside
- Solutions to the Wine Lab from Hanna Instruments
Does Your Wine Analysis Have Meaning?
One thing that is key: every test you run in a wine lab should have meaning and give you an actionable result. Even if that result is that your wine is just fine and you don’t need to do anything (which is the best actionable outcome!). Too often tests are simply run out of habit or to have a number that fills a space in the database. In the very least, unnecessary testing is a waste of time and money. At worst, old lab numbers may be pulled and used in the decision-making process.
Acting on out of date, or incorrect information is a poor-quality control process. This can lead to poor quality outcomes. It is key for winemakers to identify what tests provide the information necessary to make decisions in their winemaking process, and at what time those tests should be performed. It is always best to act upon recently obtained results, as you’re responding to the conditions of the wine as is (as close to live time as possible). For certain processes, such as testing for cold or heat stability treatments, it may not be practical to perform an action until a given timeframe. However, a problem such as VA (volatile acidity) blooms requires immediate attention. The results from the lab need to be clear, concise, and understood by the lab and winemaking staff. The winery labs that run the best quality control are the ones proactively testing wines with defined analyses at designated stages of the winemaking process. Then, base best cellar practices on the feedback those lab results provide.
Map Your Wine Testing to the Stages of Wine Making

Winemaking is generally a long process with several distinct stages. Even the freshest of Beaujolais Nouveau wines is generally has a two to three month inventory cycle to produce a bottled wine. Some specialty wines can spend a decade or more in the production process before becoming a finished product for consumers. Clearly defining the stages of your winemaking process allows you to determine what key parameters you want to track as the wine moves from fruit on the vine to finished beverage in the bottle. Marrying these stages to your lab testing streamlines the lab analysis process. Thus, making sure your testing is providing the most meaningful quality control feedback at the time when it is most necessary. Success in this feedback system, more often than not, leads to success in producing the best wines possible.
We generally recommend breaking your winemaking process down into the following stages:
- Preharvest: This is when fruit is still on the vines.
- Harvest/Crush: Picking day when grapes are being processed into juice or must.
- Primary Fermentation: This is from the time of yeast inoculation to when the final fermentation measurement is taken, and the wine is declared as finished with the alcoholic fermentation.
- End of Primary Fermentation: This this is considered the narrow time-frame between the alcoholic fermentation and further downstream processes, where you often switch over testing from juice/must parameters to young wine parameters and set initial baselines for finished wine testing.
- Malolactic Fermentation: This is the optional stage of active ML fermentation. The white wines where you prevent ML go straight to the Aging stage following End of Fermentation, otherwise they go through this stage and its subsequent testing.
- Aging: The point at which it is declared that all fermentation activity is complete and the wines are stored for whatever maturation period is appropriate.
- Bottling Preparation: This is the stage where wines are deemed sufficiently aged with the style, aromas, with flavors you are seeking, and the process of preparing the wines for final packaging as finished product is begun.
- Bottling Day: Always one of the most hectic days of any winemaker’s life. Day of bottling comes with its own special concerns and tests from the lab to make sure the last best possible outcome of finished wine makes it into the bottle.
- Post bottle QC: This is testing performed on samples pulled from the line to assure bottling success as well as any testing required post-packaging to make sure only the best possible wine is making it to market.
These stages correlate well to testing parameters that you as a winemaker would want to know.
The main commonality across each stage is you the winemaker, and the ultimate testing should be your sense of taste and smell to assure wines remain pleasing to the palate throughout the wine making process.
The Standard Wine Lab
Once you have your wine making stages mapped out, it becomes easier to understand your testing needs and to begin outfitting your winery lab. This process is not static. Wineries change over time, and their testing needs change along with it.
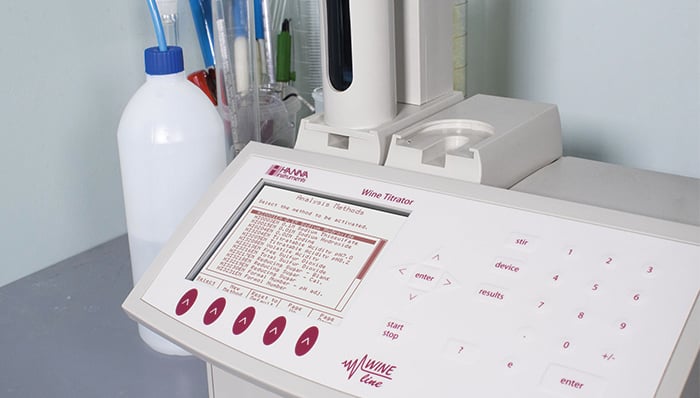
Generally, testing needs often go hand-in-hand with winery size. Small wineries often have limited capital resources and must be a bit more choosy about what lab tests and equipment are essential to their production process. Larger wineries, while still cost conscience, may venture outside of normal production parameters in their testing. They may expand into specialized specialized testing. Understanding your process and its stages should help you to define your testing needs, and establish a successful wine lab. Getting a successful wine lab started becomes about choosing what equipment best meets your needs from a cost/benefit standpoint. For instance, a 5,000-case winery will have little need for an autotitrator with a large sampling tray. Meanwhile, a 500,000 plus case production operation is likely to bottleneck lab operations with a bank of manual burettes running TA analysis.
Understanding those needs, the following are typically the common tests run in wine analysis:
- pH
- Titratable Acidity
- Brix (or other soluble solids density measurements)
- Temperature
- Yeast Assimilable Nitrogen (YAN)
- Sulfur Dioxide
- Alcohol (Ethanol)
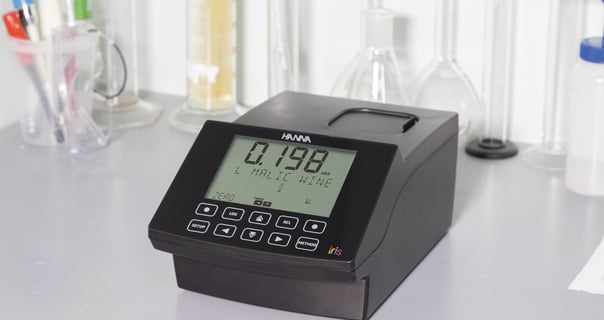
- Malic Acid
- Volatile Acidity
- Residual Sugar
- Electrical Conductivity (for cold stability)
- Turbidity (for heat stability and general clarity)
- Dissolved Carbon Dioxide
- Dissolved Oxygen
This list is by no means exhaustive. There are many other tests wineries may be interested in running for analysis. There are also tests on this list which many wineries may not run. In general, these will be the most common testing needs for standard production operations of red, white, and rosé table wines.
Building Your Wine Lab Testing Map
Now that we've defined the stages of winemaking and laid out what the common wine tests are, let’s map the two and build a lab testing strategy. This strategy should that provide you, the winemaker, with a testing strategy that gives the most actionable information in your decision-making process.
Preharvest
At this stage we’re most concerned with fruit ripeness and when to choose the optimum picking date. The common lab tests for monitoring fruit ripeness are pH, titratable acidity, and Brix. We’ll also add temperature measures, as pH and Brix are influenced by temperature variations.
Harvest/Crush
We’ve decided to pick and now it’s time to determine our final ripeness and assess if our juice is ideally suited for fermentationWe’re going to use pH, titratable acidity, Brix, and temperature once again. Plus, we will also determine our YAN status to see if any nutritional additions are called for to prevent stuck fermentations. This is ideal stage for making adjustments to those pH and acidity numbers, so there may be some before and after testing occurring.
Primary Fermentation
At this stage, the main concern is a steady, even fermentation rate. The even fermentation rate should produce a pleasant aroma and flavor in the new wines. We don’t want stuck fermentations occurring or wild swings in our fermentation rate. We’re looking at temperature to maintain a consistent rate, and are going to watch our Brix to determine the rate of our sugar conversion.
End of Primary Fermentation
This is when we’ve reached that final stable Brix reading and have called our alcoholic fermentation complete. At this point, it’s good to baseline some of the common wine tests so you can track their status over time. You want to know how much alcohol did my fermentation produce, the pH of the young wine, its titratable acidity, and how much residual sugar is left from the fermentation. You're going to start moving the wine’s temperature to its ideal value for either ML fermentation, or to go to aging. You will want to baseline the volatile acidity number to see any changes during the ML fermentation and aging processes. it is a good idea to also baseline the malic acid in the wine for the next stage of the process.
Malolactic Fermentation
To do, or not do. That’s the question every winemaker needs to answer. In general it’s a yes for every red wine, while it’s more situational for whites and rosés. At this stage, as far as the lab is concerned, you want to know your temperature numbers. That way your wine's temperature will be optimal for ML bacteria. You'll want to track the decrease of malic acid during this process the same way you tracked Brix during primary fermentation. Though, with less frequency than the Brix measurements. You may also want to pay attention to changes in titratable acidity and watch for any significant increases in volatile acidity at this point to make sure no spoilage activity is occurring.
Aging
At this point you’ve declared all fermentative activity you want to occur in the wine as complete. Red wines and big whites go to barrel if they haven’t already done so. Fruity whites and rosés get tucked away cold into stainless steel. This is the stage where you should become extremely interested in the interaction between pH and SO2 when it comes to winemaking. You'll make you're first post-fermentation addition and continue to monitor the two numbers in concert throughout the wine’s aging process until it’s bottled and ready for market. You want low and steady temperatures for slow and even maturation. It's smart practice to run volatile acidity with every SO2 check, or more frequently if there’s anything of potential concern. While not critical, it's good to track titratable acidity every couple of months during aging to make sure the measurement is stable, as any significant change is a red flag.
Bottling Preparations
When it comes to the lab, this is kitchen sink time. You're going to want to know all final parameters, as wines are coming down the stretch. Has anything changed after late processes blending? Are the wines within their ideal ranges with the aroma and flavor you want in the finished product? Do you need to do any acid adjustments for flabby or overly tart wines? Stability testing factors in here as well, as most fining and filtration treatments, so testing for electrical conductivity and turbidity come into play. You will want to dial in your pH and SO2 numbers as best as you can and maintain that through packaging. Run residual sugar and malic acid tests for any wines you feel may not be complete to dryness so you can plan bottling protocols. You need an accurate alcohol measurement on everything going through the COLA process to declare final amounts for the finished wines. Continuing to monitor volatile acidity, especially as the wine goes through several treatment processes such as filtration is also important. You also want to know your dissolved gas measurements. These include the amount of CO2 present for the final product and a baseline for oxygen prior to bottling. As you approach bottling date, you'll want to bring the temperatures of the wines up to ideal ranges for the bottling process.
Bottling Day
When you work at a smaller winery and the bulk of this operation occurs all at once, it tends to be one of the most stressful times in a winemaker’s job. At this point, your wines are at the finish line. Any added treatments or adjustments for most factors at this point are excluded since the wine has gone through fining, filtration, or any end stage processing. Come bottling, the key things the lab is going to do are check final temperatures to make sure wines are in range and do one last run of pH and SO2 the morning of to make sure target numbers are achieved for the bottling process. Once the run begins, QC samples are pulled at regular intervals. In addition to holding finished samples for post-bottling checks, you’ll also look at dissolved oxygen changes between pre-bottling numbers in tank and post-bottling samples off the line to make sure no excess aeration is occurring in my bottling process.
Post-Bottling QC
You’re dealing with finished product at this stage, so the goal is to assure that any wine leaving the winery is up to quality standards. This is your last chance to guard your brand against a bad tasting bottle. What to look for is a time period with no obvious changes inside the bottle from a visual standpoint that indicate either physical or microbial instability. You'll also want to run final checks on dissolved oxygen and check my pH/SO2 after packaging to see the final numbers. If bottling any whites or rosés with a touch of spritz, just add in dissolved CO2 tests to check before and after values. If any wines were borderline for VA threshold (something that can be common for ripe, high alcohol, jammy reds from hot climates), run a final QC check on that parameter as well.
What we just mapped are the main concerns a winemaker has during standard winemaking processes. Not all of these tests are going to be available to every winery, and some will run many others in addition to those we mapped. Overall though, this is consistent lab protocol for maintaining optimum wine quality throughout the winemaking application.
Wine Analysis In-House vs. Outside
Now that we’ve mapped our lab testing protocols to our winemaking process, it comes time to make decisions as to what lab equipment best suites your lab testing needs. Not every test is practical to run for every winery, particularly as some may be cost luxuries given the equipment investments involved. The first question to ask is whether it is more feasible to run a test in-house versus sending samples to a commercial lab for analysis. Wineries need to weight the cost per sample between the two, as well as the factor of time. Production volumes also come into play at this point. Testing a large commercial white wine for cold stability on a bench scale in the lab can potentially save the company large sums of money in supplies and labor if the lab determines the wine is already stable and doesn’t need treatment for instance, so larger wineries may choose to have that testing option readily available to their lab.
Common tests run frequently, such as SO2 analysis, are almost always a cost savings to the winery if able to perform the analysis in-house. Less common testing requiring specific and dedicated instrumentation is often what gets sent to third party labs. As you become more familiar with the fruit from your vineyards, you’ll find that the most pressing testing needs generally present themselves, and that determines where your investments are best spent in the wine lab.
Solutions to the Wine Lab from Hanna Instruments
.jpg?width=300&name=HI2020W-edge_with-wine-probe-ebook_720x720_72_RGB%20(1).jpg)

From vine to glass...
Your wine has quite the journey. You don't have to go it alone - let us support you in all of your testing needs. For help in choosing the best option for your wine map and testing needs, please contact us using one of the channels below.
