 pH meter calibration is a necessary step of using a pH meter because of how the electrode changes over time. Your pH electrode is designed to measure pH based off of slope and offset (the Nernst Equation).
However because of aging and use, the electrode's performance will stray from the theoretical slope and offset over time. Regularly calibrating your pH meter will adjust your electrode based off any changes that may have occurred and ensures that your readings are accurate and repeatable.

Before you start calibrating, make sure that the electrode is in good condition. It should be clean, hydrated, and have no obvious physical damage like cracks or scratches. If any visible damage can be seen, the electrode needs to be replaced.
Keep Your pH Electrode Hydrated

If your electrode is dry, rehydrate the sensing tip by soaking the bulb and junction in an electrode storage solution for at least one hour or more. Storing your electrode in storage solution also improves its life span and performance.
Storing your pH electrode in storage solution rather than water is important for reducing microbial growth, preventing the reference electrolyte from leaching out, and keeping the junction clear. If you're out of storage solution, pH 4 or 7 buffers can be used in a pinch.

Cleaning Your pH Electrode
Soak the electrode in a general cleaning solution, or an appropriate use-specific cleaning solution, for at least 15 minutes before calibration to dissolve contamination.
When possible, we strongly suggest using a cleaning solution specially designed for what you are testing. Each dedicated cleaning solution is made to effectively remove the specific types of stains and deposits from your sample. (For example, the cleaning solution for wine making will remove the deep stains that red wine and must can leave behind.)

After cleaning, rinse the pH electrode thoroughly with distilled or deionized (DI) water, and then soak the electrode in storage solution for at least 2-3 hours before calibration. We recommend soaking the electrode overnight for best results.
Maintaining Your pH Calibration Solutions
To prevent contamination of your calibration solutions, never submerge your electrode right into the bottle. Pour out just what is needed into a container that has been rinsed with DI water, and use that for your calibration. Never pour used buffer back into the bottle!
Our calibration buffers are designed to have a long shelf life when left unopened. Once opened, a buffer with a pH lower than 7 will last around 4-8 weeks, while a buffer with a pH over 7 will be good for about 1-2 weeks.
Other Helpful Tips
Check the electrolyte fill level
 If you have a refillable electrode, make sure that the electrolyte fill level is at least half an inch from the fill hole or closer. Check the electrolyte for contamination and refill it with more electrolyte if necessary.Use a magnetic stirrer

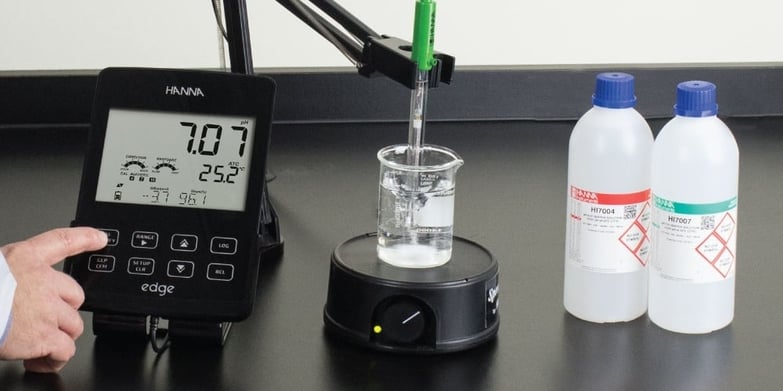
A magnetic stirrer will ensure that the pH buffer or sample is completely mixed. The movement will also increase the response time of the electrode in the solution. If you don't use a magnetic stirrer, you should gently stir your sample with the probe while calibrating and testing.
pH Meter Calibration Overview
Preparing the pH electrode
First remove the protective cover from the electrode bulb and rinse the bulb in DI water to remove any salt crystals. After rinsing, shake down the electrode like you would with a liquid thermometer to remove any excess DI water. (Never wipe the sensing tip!) If necessary, refill your electrolyte. Now you're ready to start calibrating!
Hanna Tip: The formation of salt crystals on your pH electrode is normal. It happens when the storage solution evaporates during shipment or over a long period of unuse.
Preparing the calibration solutions
We recommend bracketing your calibration by using at least two different buffers. Also known as a two-point or multi-point calibration, bracketing consists of calibrating to two pH points, one above and one below your expected pH range.
As an example, if you want to measure the pH of lemon juice, which has a pH around 2, you could use pH buffers 1.00 and 4.01 for a two-point calibration.

For even better accuracy, you can perform a third calibration at pH 7.01, since this is how the offset is determined. Calibrating at pH 7.01 can determine problems such as a contaminated or broken probe, and helps avoid any errors in measurement.
We recommend calibrating daily for best results. However, if high accuracy is not crucial to your measurements, it's okay to calibrate once or twice a week. Since the shelf life of a solution is cut short after the bottle is opened, if you're only calibrating once a week or so a good option for you is the single-use packets. With these packets, you are a guaranteed to be using a fresh buffer every time.

Performing pH meter calibration
Start by rinsing the electrode in DI water. Either use a rinse bottle, or fill a beaker with your DI water and stir the electrode gently for 4-6 seconds.
Hanna Tip: Hanna recommends rinsing with pure water, such as deionized (DI), distilled, RO, or demineralized (demi) water.
Then place the electrode in your first calibration solution, being careful to fully submerge the sensing tip and junction, and stir gently or use a magnetic stirrer. (If you're using a stirrer, make sure that a vortex is not forming.) Wait for the reading to stabilize for at least 3 seconds, and confirm the calibration. Repeat this process as needed for your other calibration solutions.
Now you're ready to take your measurements and be confident in their accuracy.

Optional: Check your Good Laboratory Practice (GLP) Data
Many Hanna meters have a GLP data screen that allows you to verify that the electrode’s calibration data is acceptable for use in measurement. This data includes the slope and offset of the electrode.
The slope should be between 85-105% (51-62 mV/pH unit) and the offset should be between ±30mV. If your electrode is outside of this range, try cleaning, reconditioning and calibrating with fresh buffer. If the problem persists, you may need to replace your electrode.
Learn More: The Top 10 Mistakes in pH Measurement
